Getting Started
Adding a CTA

CTAs are very simple to understand. A CTA can be a button or a text field.
With the CTA Tree, you can create branching paths and funnels to guide users through different flows.
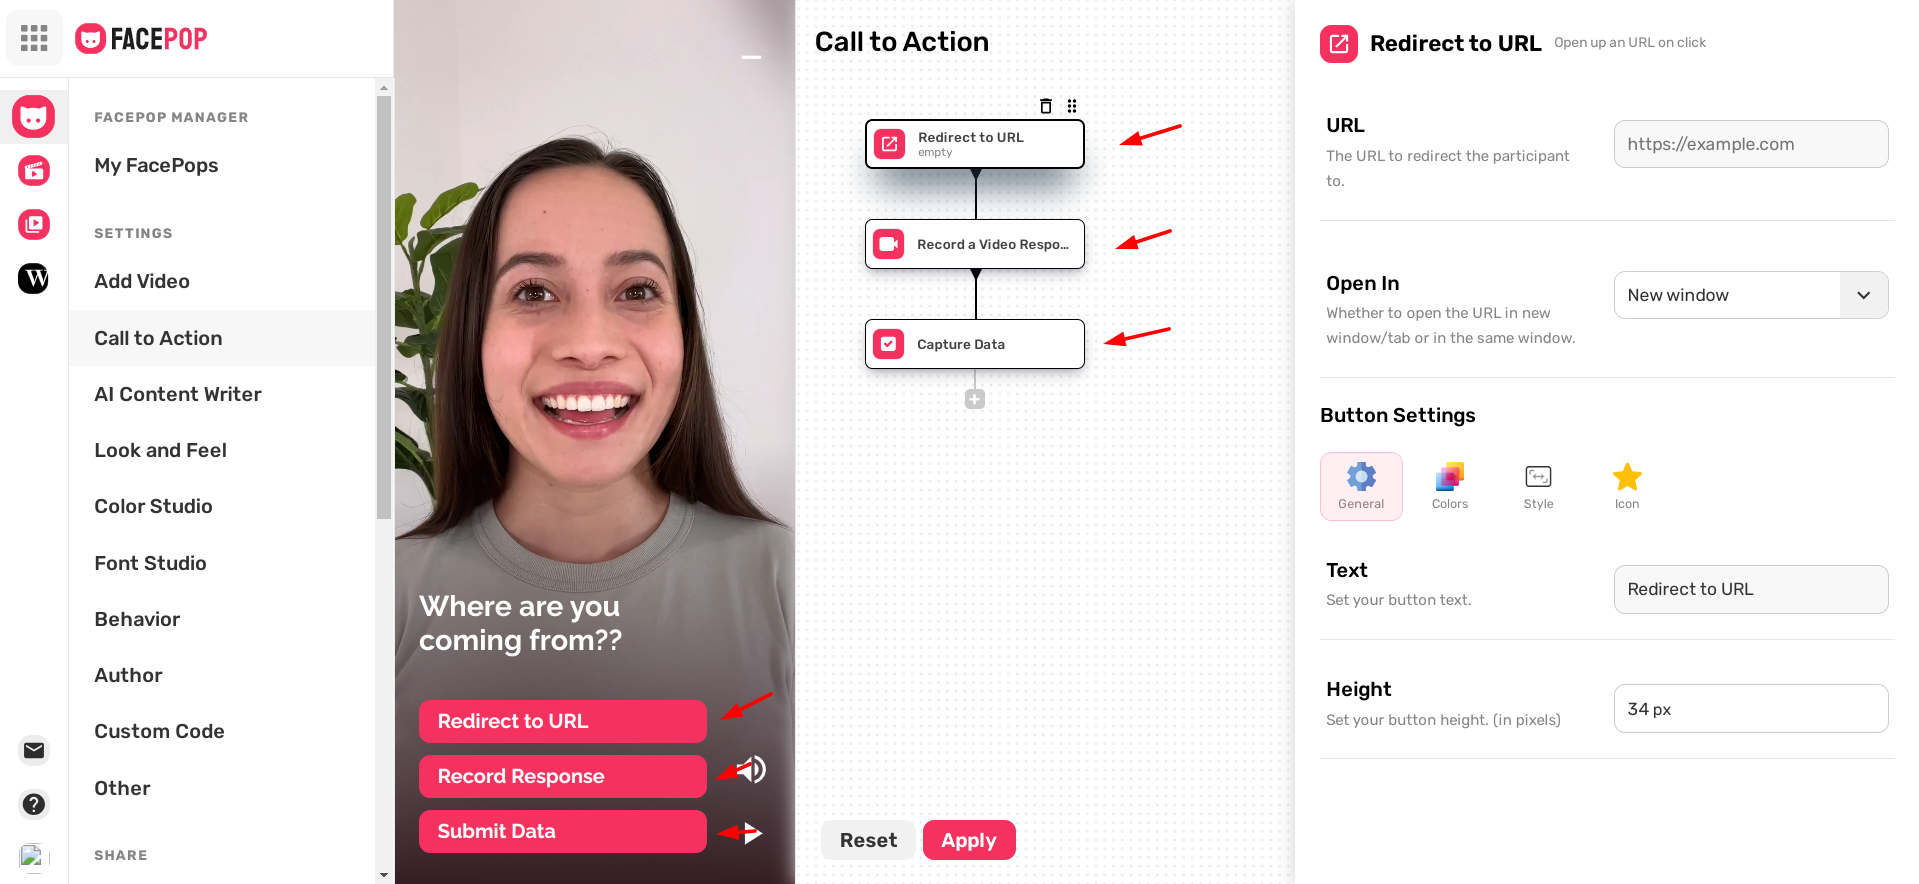
Step 1: Go to the Add CTA Page
- Open this page: CTA Page.
- You will see the CTA Tree on the right side.
- Click Add CTA to add a new node to the tree.

Step 2: Choose a CTA Type
When you click Add CTA, a modal will appear with all the CTA options:
- Redirect to URL – Opens a specified URL on click.
- Play another Video – Redirects to another video when clicked.
- Record a Video Response – Allows users to record a video response on click.
- Capture Data – Collects data from the user during interaction.
- Book a Calendar – Opens a calendar booking form inside the widget.
- Embed Website – Displays a website inside an IFrame within the widget.
- Custom Code – Executes custom JavaScript code when clicked.
- Download File – Triggers a file download on click.
- Dial a Number – Dials a phone number when the CTA is clicked.
- Send an Email – Opens the user's email client to send an email.
- Close the Widget – Closes the widget on click.
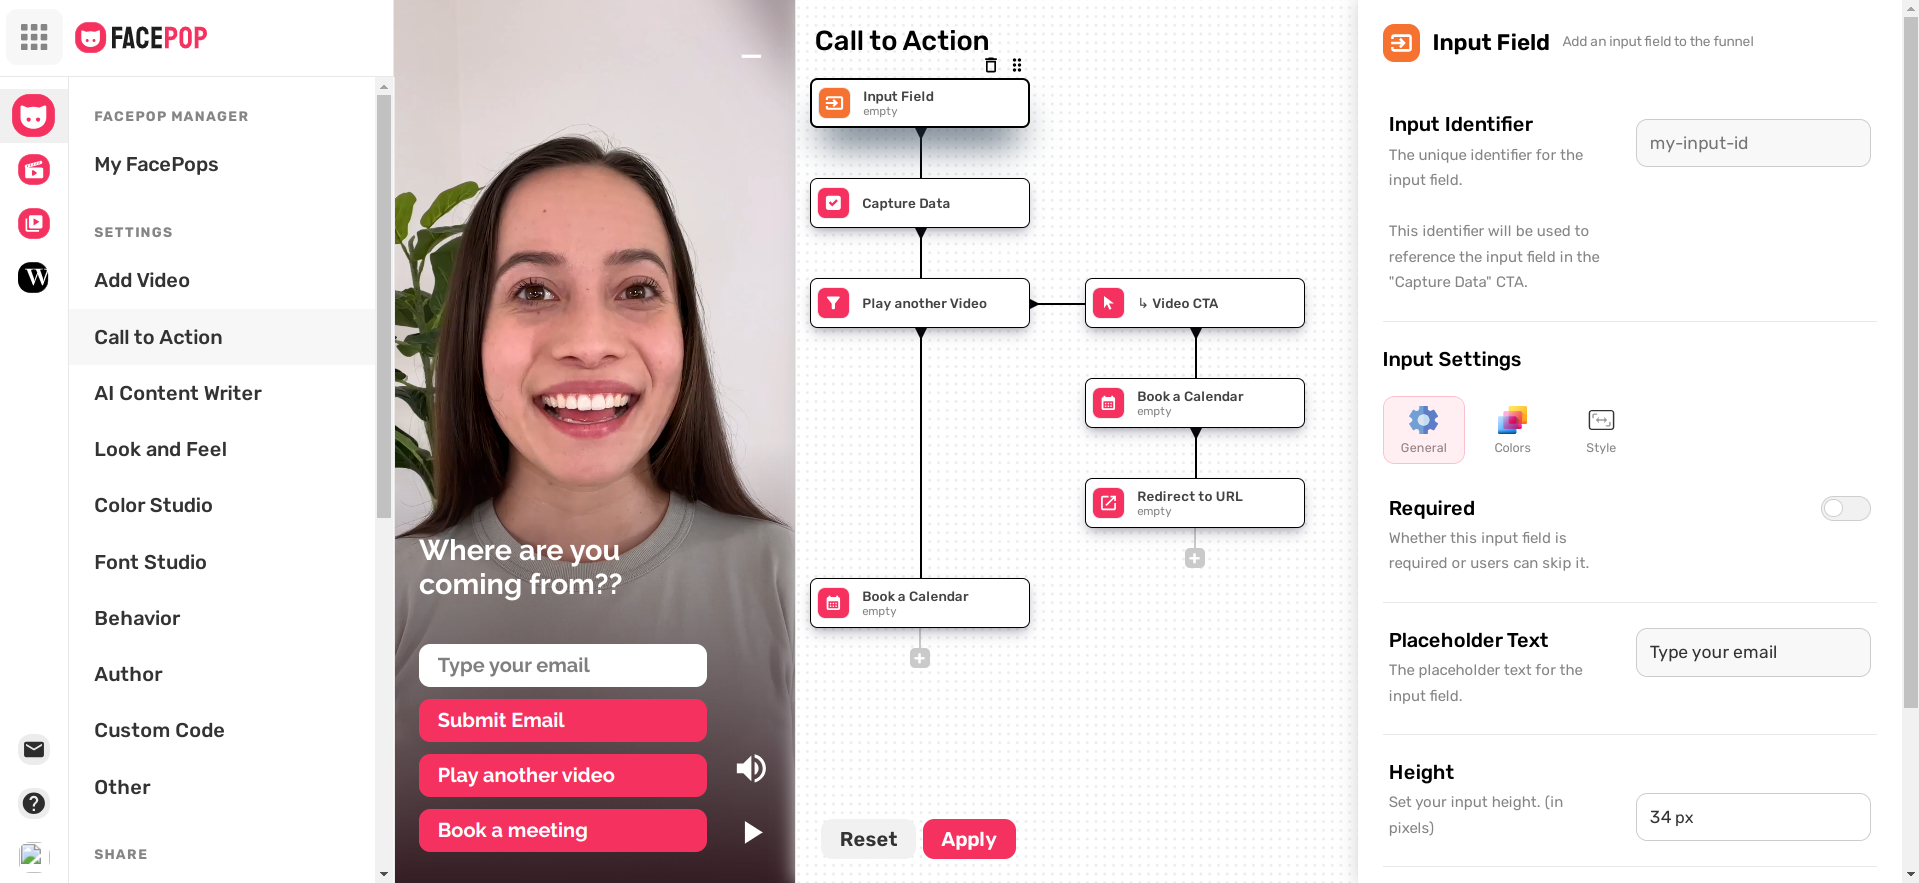
- Input Field – Adds an input field to the funnel. Specify an element ID, e.g., email_address, which can then be referenced in other CTAs or webhook bodies using
{{email_address}}. - Connect to a FacePop – Connects to another FacePop widget, allowing branching and funneling for advanced user journeys. Learn more about creating a funnel effect 🚀.
- Chat with AI – Opens an Answerly Chat within the widget to interact with AI.

Step 3: Understand the Tree
The CTA Tree lets you organize CTAs in a flexible, branching structure:
- Each node is a CTA.
- Siblings are nodes on the same level, representing multiple options the user can select at the same step.
- Children are nodes that appear after a parent CTA, creating subsequent steps in the funnel.
Think of it like a flowchart: users move from one node to the next, and each node can open multiple paths depending on your setup.
Step 4: Build a Flow
Here’s an example using some of the CTA types:
- Add an Input Field node to collect an email (root node).
- Add two siblings:
- Play another Video
- Book a Calendar
- Add children nodes for each sibling if needed:
- Play another Video → child: Book a Calendar and Redirect to URL
This setup demonstrates how the tree gives you full flexibility to create branching paths and funnels.
Branching Tips
- Plan your flow first: Decide what actions should be siblings and what should be children.
- Use siblings for parallel options: Add multiple CTAs on the same step when users can choose between them.
- Use children for follow-up actions: Attach subsequent steps to a parent CTA for branching.
- Combine different CTA types: Mix input fields, redirects, videos, and calendar bookings to create rich, interactive flows.
- Visualize the flow: Use the tree view to make sure each branch is clear and logical.
- Test your branches: Walk through each path to ensure users experience the intended sequence of CTAs.
And that's it! You now have CTA trees with branching to engage your customers like never before! 🚀