Integrations
Using Webhooks

Hey there 👋
With FacePop, you can automatically trigger actions when a visitor submits their information through a Capture Data CTA.
Webhooks are configured directly inside your CTA ✨
How Webhooks Work
A webhook is triggered the moment a visitor submits data (for example, their email address).
The setup process is simple:
- Add your input fields (e.g. Email, Name, Phone)
- Add a Capture Data CTA
- Configure a webhook inside that CTA
Clean and straightforward ✅
Adding a Webhook
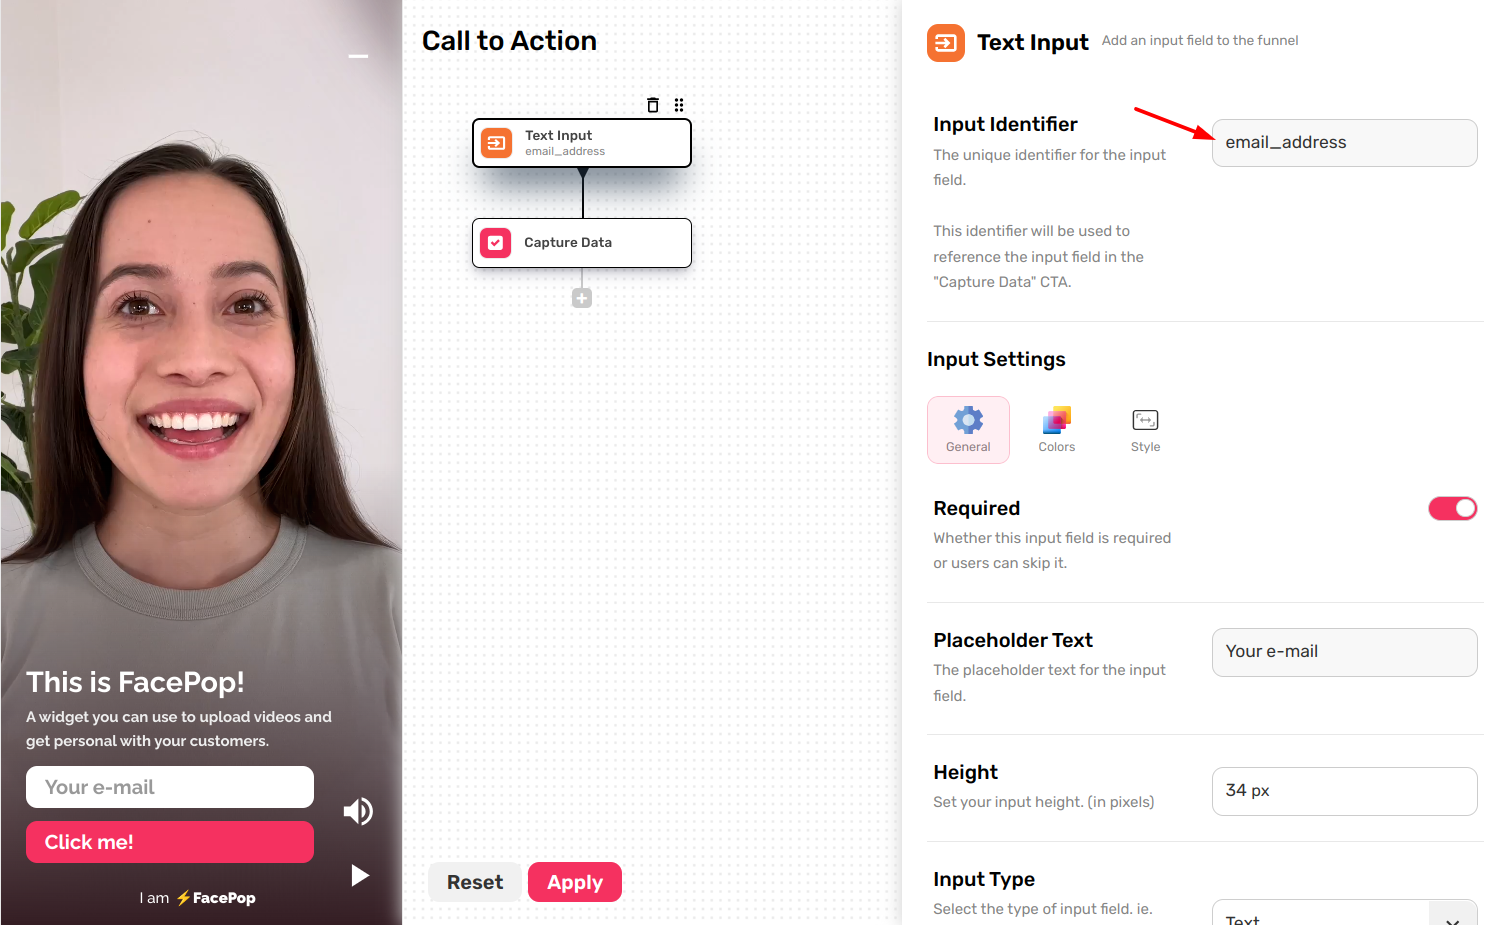
1️⃣ Add Your Input Fields
Start by adding the fields you want to collect (for example, an Email field).
Each field must have a unique Element ID.
Example:
email_address
You will use this Element ID as a dynamic placeholder inside your webhook configuration.
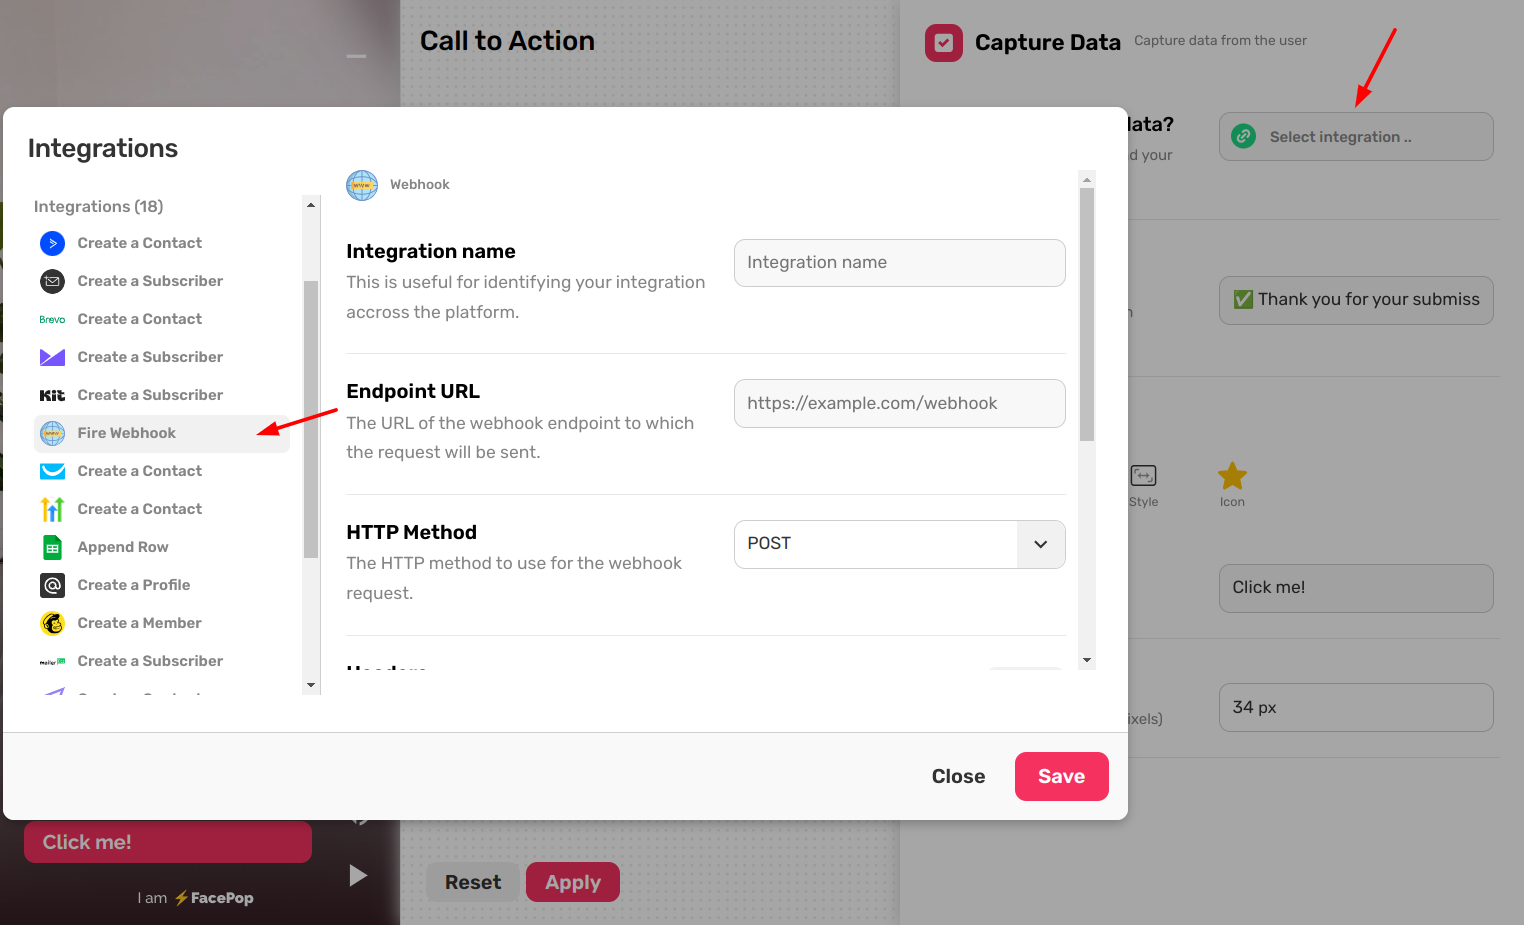
2️⃣ Add a Capture Data CTA
Once your fields are ready:
- Add a Capture Data CTA
- Open the Integration settings modal
- Select Fire a Webhook
This will open the webhook configuration panel.
Webhook Configuration Options
Below is a breakdown of each available setting.
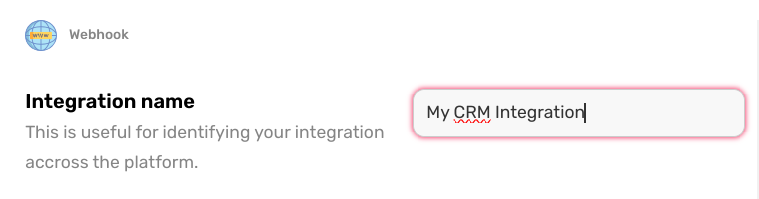
🔹 Integration Name
This is for internal use only. It helps you identify the webhook inside your dashboard.
Example:
My CRM Integration
🔹 Endpoint URL
This is the URL where the webhook request will be sent.
Example:
https://example.com/webhook
You can also include dynamic placeholders in the URL if needed:
https://example.com/webhook?email=

🔹 HTTP Method
Choose the HTTP method your endpoint expects.
Common options:
- POST (most common)
- GET
- PUT
- PATCH
In most cases, you will use POST.

🔹 Headers
You can add custom headers to authenticate or structure your request.
Examples:
Authorization: Bearer YOUR_TOKEN
X-API-Key: YOUR_API_KEY
Click Add if you need to include multiple headers.

🔹 Content Type
Defines how your request body is formatted.
Common options:
application/jsonapplication/x-www-form-urlencoded
In most cases, you’ll use:
application/json

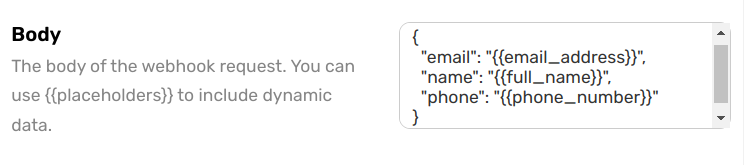
🔹 Body (Request Payload)
This is the data sent to your endpoint when the webhook fires.
You can insert dynamic placeholders using double curly brackets:
Example JSON Body
{
  "email": "{{email_address}}"
}
When a visitor submits the form, placeholders are automatically replaced with real submitted values.

Using Custom Fields
If you added additional fields (such as name, phone number, company, etc.), simply use their Element ID inside double curly brackets:
Example:
{
  "email": "{{email_address}}",
  "name": "{{full_name}}",
  "phone": "{{phone_number}}"
}
You're All Set 🎉
Once configured, your webhook will instantly fire whenever someone submits data in your FacePop widget.
You can now connect FacePop to CRMs, email marketing tools, automation platforms, or any custom backend.
Go ahead and try it, automation magic starts here ✨